Aquarium Setup for Beginners: A Step-by-Step Guide to a Healthy Tank
Emerson Hayes
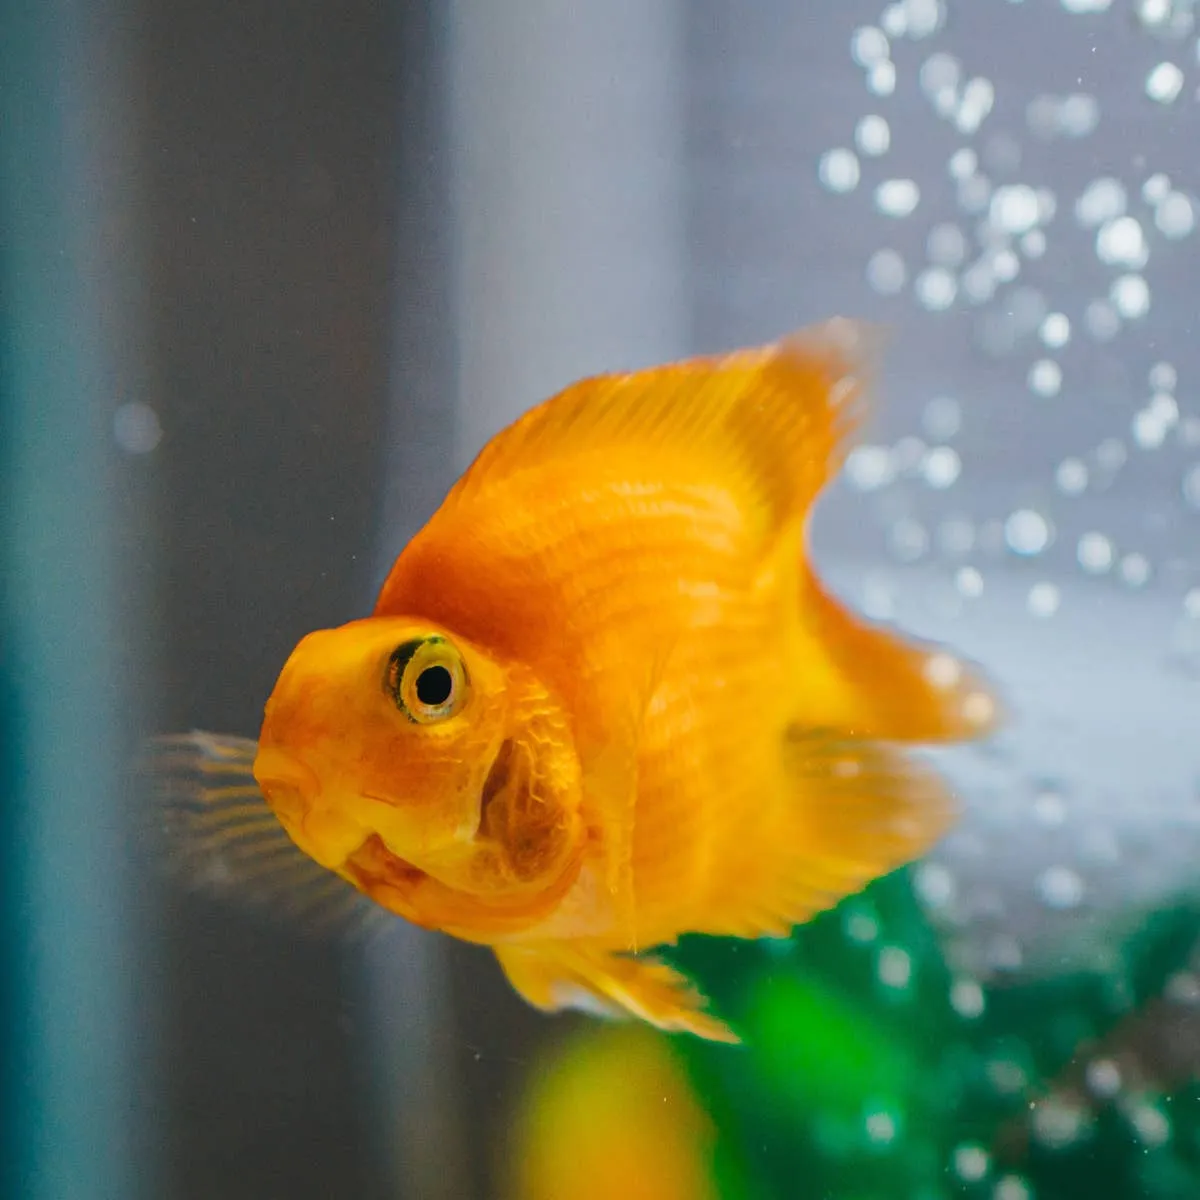
Beginner's Guide to Setting Up a Fish Tank
When I worked in a pet store's aquatic department years ago, customers would often come in and tell me they had bought an aquarium elsewhere, set it up, and then watched their fish die shortly afterward.
If you understand what fish need and how to keep them healthy, setting up and maintaining an aquarium is actually quite simple.
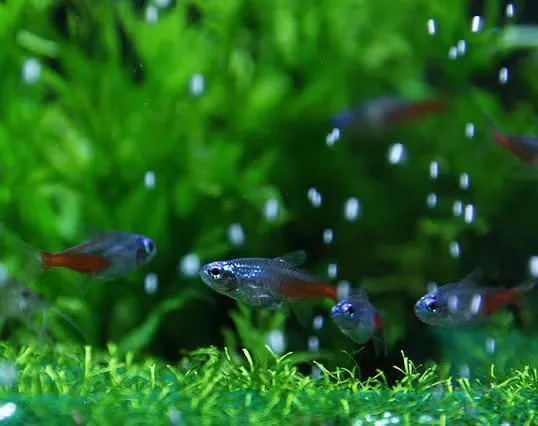
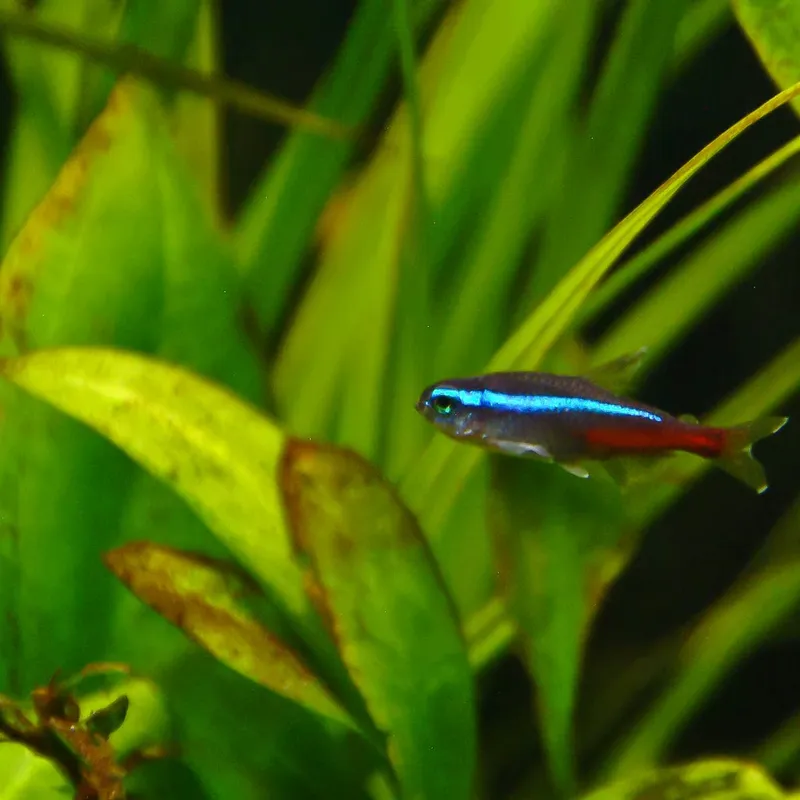
This healthy tank contains Neon Tetras. Notice the oxygen being produced by the healthy plants.
fox_kiyo CC BY-SA 2.0 via Flickr
Preparing for a Successful Aquarium and Healthy Fish
It's easy to fall in love with a fish you see and buy it before you've prepared a proper home. If you truly care about the fish's well-being, resist that urge until you've made the necessary preparations. Doing so helps ensure a long, healthy life for your new pet.
Understanding Your Water Supply
Knowing a little about your water gives you an edge when choosing fish. For instance, if your water is very soft, some fish—like guppies—may struggle more than species that prefer soft water, such as tetras, rams, angelfish, or discus.
Is Your Water Treated?
You might want to call your local water municipality to learn how your supply is treated. Most municipal water contains chemical additives such as chlorine or chloramine, both of which can harm the beneficial bacteria in your aquarium and be harmful to your fish. Chloramine is particularly troublesome for aquarium hobbyists because it is a combination of chlorine and ammonia. Ammonia is highly toxic to aquarium fish.
If your water contains chloramine, some dechlorinating products won't be effective against the ammonia within it. You'll need water conditioners specifically labeled as effective for treating chloramine if your supply contains it, for any water added to your aquarium.
What Are Your Water's pH and Hardness?
You may also want to learn more about your water, such as its pH or hardness. You can buy test kits to check your water, or some pet shops will test it for you.
Researching the Fish You Want
One of the most important steps in becoming a successful fish keeper is learning everything you can about the fish you're interested in. By studying the species, you'll discover several important factors that affect your aquarium setup, including:
- The tank size the fish will need as it grows
- The water parameters it requires
- Its dietary needs
- Which other fish can live with it
- How to breed it (if desired)
- Any other species-specific requirements
Researching Live Plants for Your Tank
If you decide to use live plants—which I highly recommend for most aquariums—you'll want to research which plants (if any) suit your situation and how or whether they should be planted.
Beyond the benefits they provide to the aquarium, plants can also be propagated. Our Cryptocoryne wendtii started as a single plant several years ago, and now we have hundreds.
Many plants have specific lighting needs and may also require CO2. Beginners might look for a plant without special lighting requirements and no CO2 need. One of my favorites is Cryptocoryne wendtii, which requires little care in my tanks.
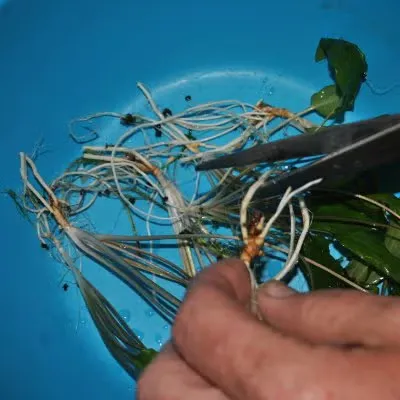
Here we are trimming roots from plants we are dividing for use in other aquariums.
Setting Up the Aquarium
You'll want to set up your aquarium well before you purchase any fish for your new tank.
Buying the Basics: Substrate, Ornaments, and Plants
Choose the type of substrate or gravel you want to use and select any ornaments for your tank. Be sure to pick only ornaments that are safe for aquarium use. Some items not designed for aquariums can be toxic to your fish.
If you plan to use plastic plants, you can buy them now. If you want live plants (I prefer live plants), you may wish to wait a few days before purchasing them.
Washing the Tank, Gravel, and All Ornaments
Thoroughly wash everything you're going to put in your aquarium. Any item you place in your tank should be safe for aquarium use. Never use chemicals to clean your aquarium or its contents. Only warm water should be used. Soaps or detergents can be toxic to your fish.
I like to use a 5-gallon bucket to clean aquarium gravel. Stir the gravel, drain, and repeat until the water runs clear.
Choosing the Right Location for Your Aquarium
Where you place your aquarium can significantly affect how much maintenance it needs and can even influence the health of your fish.
The Location Should Be Safe
Choose a spot where your aquarium is safe from small children who could accidentally be injured by the tank or nearby electrical appliances. Small children should be supervised around the aquarium, as it can be dangerous for both them and the fish.
Avoid high-traffic areas. Setting up an aquarium in an entryway or other busy area puts your tank at risk of being bumped, knocked over, or cracked.
Ideally, the location you choose should have a GFCI circuit protecting you, your fish, and your aquarium equipment. In the United States, several GFCI products designed for aquarium use are available today. These plug directly into a regular household outlet, so no electrician is required.
The Location Should Offer Easy Access
Your aquarium should be placed where you can easily reach it at least twice a day and should have enough space around it to perform periodic maintenance.
Try not to put your aquarium where it might be forgotten or neglected.
The Location Should Not Be Near Windows or HVAC Vents
Avoid placing the aquarium near a window where it will receive direct sunlight. Putting your tank near a window makes it hard to control how much sunlight it gets and will likely lead to excessive algae growth.
Locations near windows tend to have larger temperature fluctuations than other parts of the home. This can affect the overall health of your fish, and in extreme cases, high or low temperatures can be fatal for your aquarium's inhabitants.
Heating and cooling vents can also cause rapid temperature changes in the objects directly around them or make them extremely cold or hot. Try to keep your aquarium a few feet away from these HVAC vents.
The Location Should Support the Aquarium's Weight
Another consideration is the aquarium's weight and whether the floor supporting the tank, lights, pumps, stands, and other equipment can withstand that weight over the long term.
Aquarium water weighs roughly 8.34 pounds per gallon. Adding all the substrate, decorations, stand, and equipment, a 55-gallon aquarium could weigh more than 500 pounds!
Choosing a Stand
In most cases, you'll want to keep your aquarium on some type of stand to make viewing the fish easier. Stands can be purchased or handcrafted. Make sure your stand is level and can bear the heavy weight of the water and ornaments in an aquarium.
An aquarium placed on an unlevel stand may crack or separate. It can be surprising how much water is in an aquarium once you see it all over the floor. Yes, this is experience speaking!
Aquariums on stands can be quite top-heavy, making them easy to tip over despite their weight. We use a small metal bracket and screws to secure our aquarium stands to a stud inside the wall they're against, helping prevent the stand from tipping over.
Filling the Tank
Once you've selected a suitable location, you can start filling the tank.
1. Add Substrate
Start with the gravel or substrate that has been washed and is ready to use. The amount and type of substrate you'll want depends on how you set up your tank and the type of filtration system you use.
I like to use two inches of black CaribSea Flora Max Planted Aquarium Substrate or a similar product in my aquariums, as I feel it helps promote beneficial bacteria growth and has been a good substrate for the plants I keep.
2. Add Some Water
Once your substrate is in the tank, you can add 2–3 inches of water. I like to place a small plate or saucer on top of the substrate so it doesn't get washed away and stays in place.
3. Add Ornaments
Now you can add any ornaments or filtration equipment you wish.
If your filtration equipment requires an air line, be sure to install a check valve in it to prevent water from siphoning out of your tank and into the electrical components of your air pump during a power outage.
Plastic or live plants can be added at this time; however, I prefer to wait a couple of days for the water to stabilize before adding live plants. This gives the water time to age a little and allows you to make sure the water heater is operating correctly at the appropriate temperature.
Now is a good time to add the water conditioner or dechlorinator to your aquarium water.
4. Add More Water
Now your tank is ready to finish filling. Placing your clean hand between the water stream and your aquarium will help keep the water from disturbing your gravel and ornaments. Be sure to leave a little space between your aquarium cover and the water so air can be exchanged at the surface.
5. Turn It On
Turn on your light, water filtration system, and heater, and make sure everything is working correctly and safely. The aquarium heater should be installed according to the manufacturer's instructions for safety and to prevent damage to the heater.
Be sure to have a thermometer available so you can check and adjust the heater. It can take several hours for the temperature to stabilize. Be sure to wait long enough for the water temperature to stabilize each time you adjust it.
6. Add Live Plants
Although it's easier to plant live plants when you place the ornaments in the tank, I prefer to add them after the tank has had a couple of days to stabilize. This ensures the temperature is stable for the plants.
Don't Add Fish Yet!
Although it's tempting to add fish at this point, the aquarium isn't ready because the tank needs to be cycled.
The Nitrogen Cycle
One of the most important things to understand about an aquarium is the nitrogen cycle.
For your fish to stay healthy, your aquarium must have a well-established nitrogen cycle. This process may take several weeks or months to complete.
Stage 1: Ammonia
Ammonia can be deadly to tropical fish by burning their gills and skin and making it difficult for them to breathe.
As soon as you add fish or plants to your aquarium, ammonia starts being produced.
Decaying plants, uneaten fish food, and fish waste all contribute to ammonia production in the tank.
Stage 2: Nitrites
Often when we think of bacteria, we think of something bad or dirty. Bacteria is vital for the health of the aquarium and its fish.
There is not just one type of bacteria—many are harmful in an aquarium, but many are beneficial and required for aquarium health.
Given the opportunity, a bacteria called Nitrosomonas will start to develop in the aquarium. These bacteria help convert harmful ammonia into nitrites.
Some types of Nitrosomonas bacteria do better in an aquarium environment than others. Because of this, adding large amounts of ammonia to the aquarium may cause it to take longer to cycle than if no ammonia were introduced.
Unfortunately, nitrites are also toxic to aquarium fish.
Stage 3: Nitrates
Soon another type of bacteria will start converting nitrites into nitrates.
Nitrates are not as harmful to fish as nitrites or ammonia, as long as concentrations don't get too high.
Live plants can help reduce nitrates in the tank, but the easiest way to control nitrates is to do partial water changes.
Using an aquarium test kit will help you monitor water quality and determine when water changes are needed.
I prefer the API Freshwater Master Test Kit over paper test strips. This kit helps you monitor pH, ammonia, nitrite, and nitrate.
A good rule of thumb is to change 10% to 15% of the water once a week, though this can vary greatly depending on the number, size, and type of fish in the aquarium.
The way the aquarium is set up and filtered can also greatly influence how often partial water changes should be done.
Easy-to-use aquarium vacuums are ideal for performing partial water changes and cleaning excess debris from the bottom of the tank.
Common Beginner's Mistake: Complete Water Changes
One of the most common mistakes I've seen beginners make time and again is performing complete water changes.
Completely removing all the water from the tank doesn't kill all the beneficial bacteria, but it does disrupt the nitrogen cycle.
The need for full water changes usually arises from trying to put too many fish in an aquarium before it has a chance to develop the nitrogen cycle.
Overloading the Nitrogen Cycle
Adding too many fish to your aquarium at once overloads the nitrogen cycle, causing an overabundance of bacteria and depleting oxygen for the fish.
Another common mistake that overloads the nitrogen cycle is overfeeding your fish. You should never feed your fish more than they can eat in a two-minute period.
When bacteria levels get too high, the water becomes cloudy, and fish start to show signs of difficulty breathing. If left untreated, the fish will soon die.
Advantages of Modern Aquariums
Fortunately, modern filtration systems make keeping a healthy aquarium much easier.
Most modern filtration systems have three components that help ensure a healthy environment for your fish.
Mechanical Filtration
Mechanical filtration removes large pieces of material from the tank by physically trapping them with material designed to act as a sieve, straining out larger particles from the water.
This mechanical filter often looks like a sponge or fibrous material.
Cleaning mechanical filters can be done by removing them and rinsing them off for reuse.
Chemical Filtration
Chemical filtration uses substances to help remove dissolved substances in the water that mechanical filtration cannot remove.
One of the most commonly used chemical filters is activated charcoal.
Although these chemical filters may be helpful in a new aquarium, I believe a healthy, cycled aquarium does not require chemical filtration and may even be somewhat harmful to a well-cycled aquarium.
Biological Filtration
Numerous products are available to help improve biological filtration. These products are highly porous, providing greater surface area for beneficial bacteria to grow.
This is where much of the ammonia and nitrites are removed via the nitrogen cycle.
Biological filtration can occur in several locations besides the filter itself. Depending on the type of substrate used, the substrate can perform substantial filtration.
Tank Setup Example
I recently set up a tank that I will use to raise Class N Endler's Livebearers. These fish are very easy to care for but do like to have lots of plants for the fry (babies) to hide in.
Preparing the Tank
I was very fortunate to acquire a 12-gallon AquaPod aquarium at our local thrift shop for only $10. These tanks are almost always used for saltwater setups but work very well for freshwater use.
Because the tank was used, it was important to make sure no diseases were left over from previous occupants.
To ensure the tank was properly cleaned, I filled it with water and a gallon and a half of hydrogen peroxide. Fortunately, our local Walmart sells quart-size bottles for only $0.88 each.
Hydrogen peroxide breaks down over 24 hours into water and hydrogen, leaving no harmful chemicals in the tank and being highly effective at killing any diseases that may remain.
I ran the pump and let the hydrogen peroxide and water mixture sit in the tank for 24 hours.
After 24 hours, I emptied and washed out the tank with warm water.
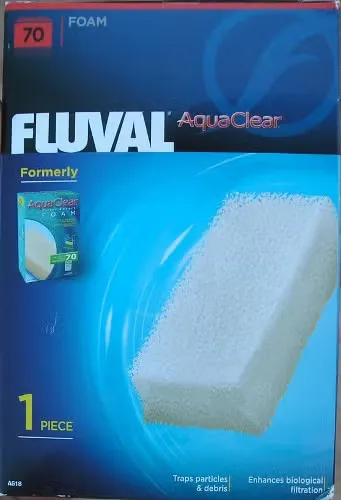
This is the foam filter media I cut to size for use in my new aquarium setup.
Adding the Filter Media
I then added the filter media. This particular type of tank actually has the filter system built into the tank; however, because this was a used tank, it did not come with any filter media.
I then went to our local pet shop and gathered some of the things I needed for the tank.
The first thing I needed was a mechanical filter media. I found a sponge-like filter media big enough to fill the opening in the tank and cut it to fit perfectly. I had to purchase and cut two of them for the filter to effectively cover the opening of the next chamber.
At this point, I stopped adding filter media because I did not need the chemical filter yet, and I did not find an affordable option for a biological filter in the pet shop.
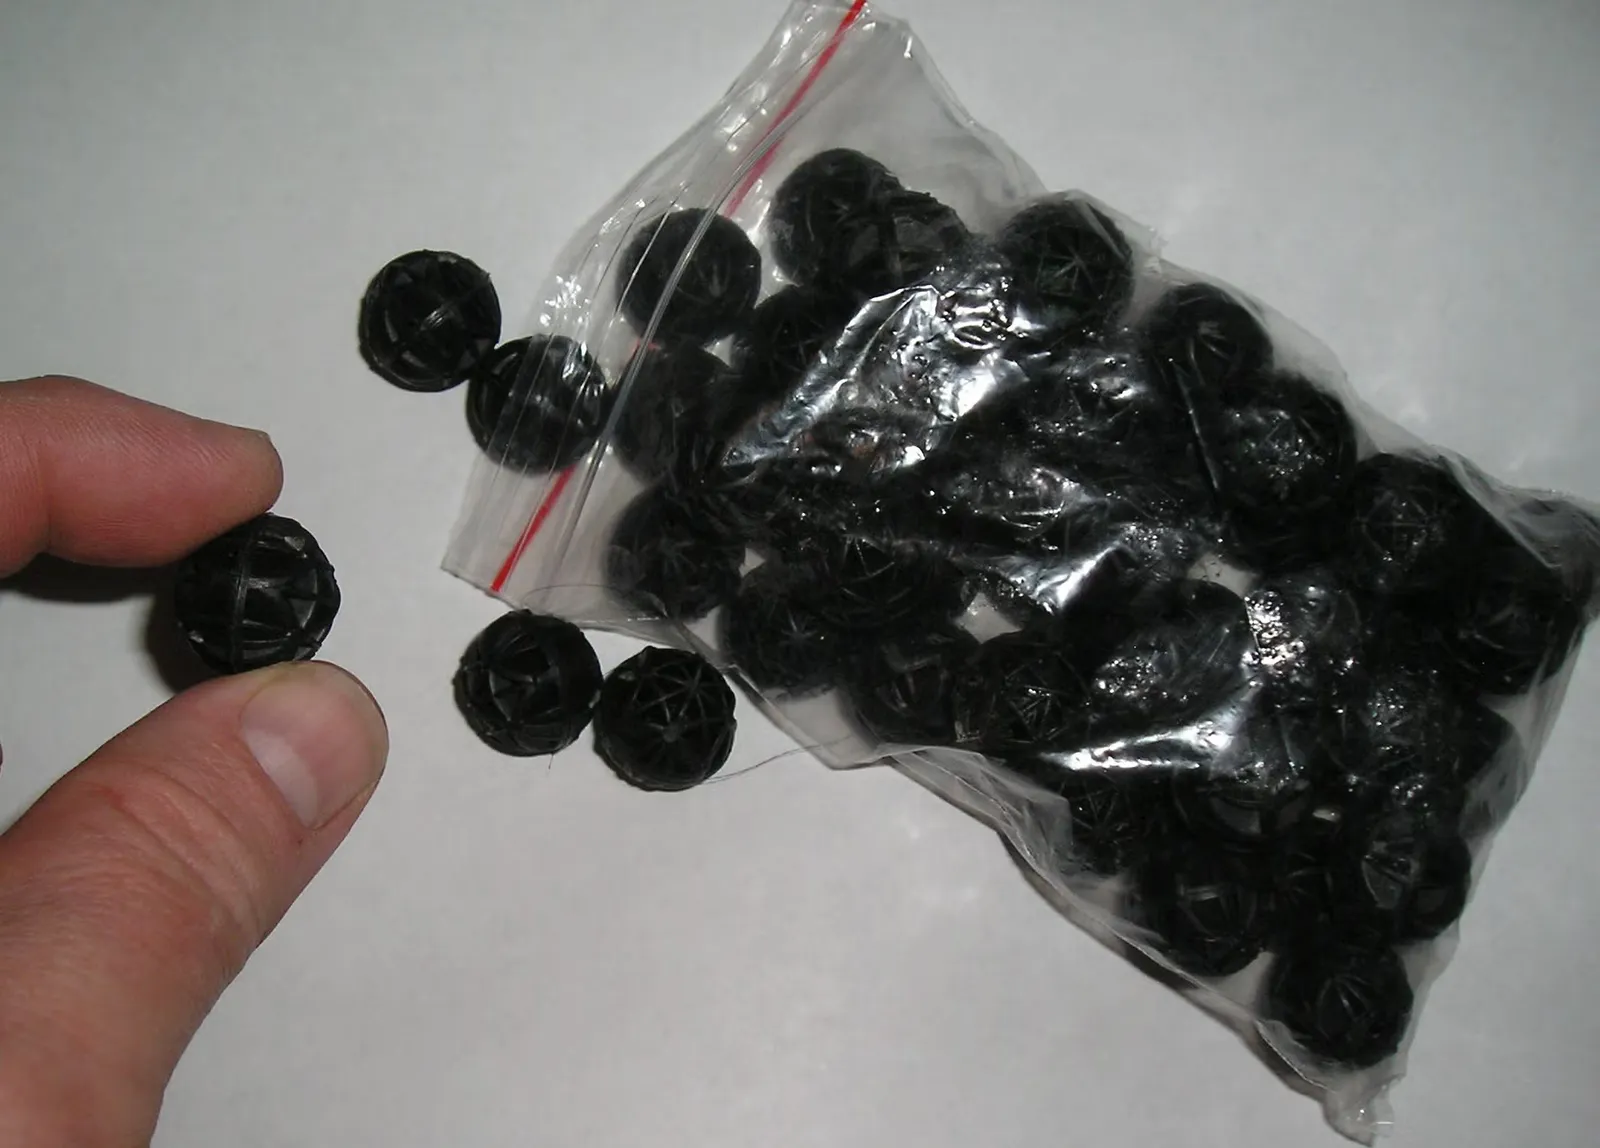
These small "Bio Balls" have foam squares inside. They are very reasonably priced out of China.
Finding the Biological Filter Media
Because I couldn't find affordable biological filter media at my local pet shop, I went to eBay to see what I could find.
I was able to find some affordable 16mm Bio Balls with sponge in the center that I liked and were at a very reasonable price.
Unfortunately, the Bio Balls had to come from China, so I had to wait a week before adding them to my tank.
While waiting for the Bio Balls, I also ordered some filter media bags to put them in.
The bag I received was fairly small, so I'll probably order a couple more in the future.
Choosing the Substrate
The substrate is the material you use for the bottom of the tank, such as gravel or sand.
Because I wanted to use live plants in my aquarium, I purchased Black Floramax Premium Aquarium Substrate.
I chose this brand because it was the only brand available in my area that looked like it would benefit my plants and be porous enough to encourage bacterial growth.
Hardscape
The hardscape is the decorations you put in your tank, such as rocks or driftwood. These pieces form the main focal points of your aquarium.
In my case, I used a piece of black and white marble that I collected from southern Arizona. I cleaned the rock well before using it in the tank.
To make the rock look more natural, I partially buried it in the substrate.
Aquarium Plants
The fish I plan to add to my tank really like to have live plants to hide and feed on. I selected a few plants that would be easy to keep in the tank and gave the aquarium the look I wanted.
Fortunately, the tank I'm using has a great lighting system for live plants.
One of the plants I selected was Dwarf Hairgrass; I purchased one package and then separated it into small clumps and spaced them somewhat evenly throughout the front of the tank.
If the Hairgrass does well, it should form a carpet of green in a few months.
Depending on how things go, I may make a homemade CO2 system for the tank at a later date.
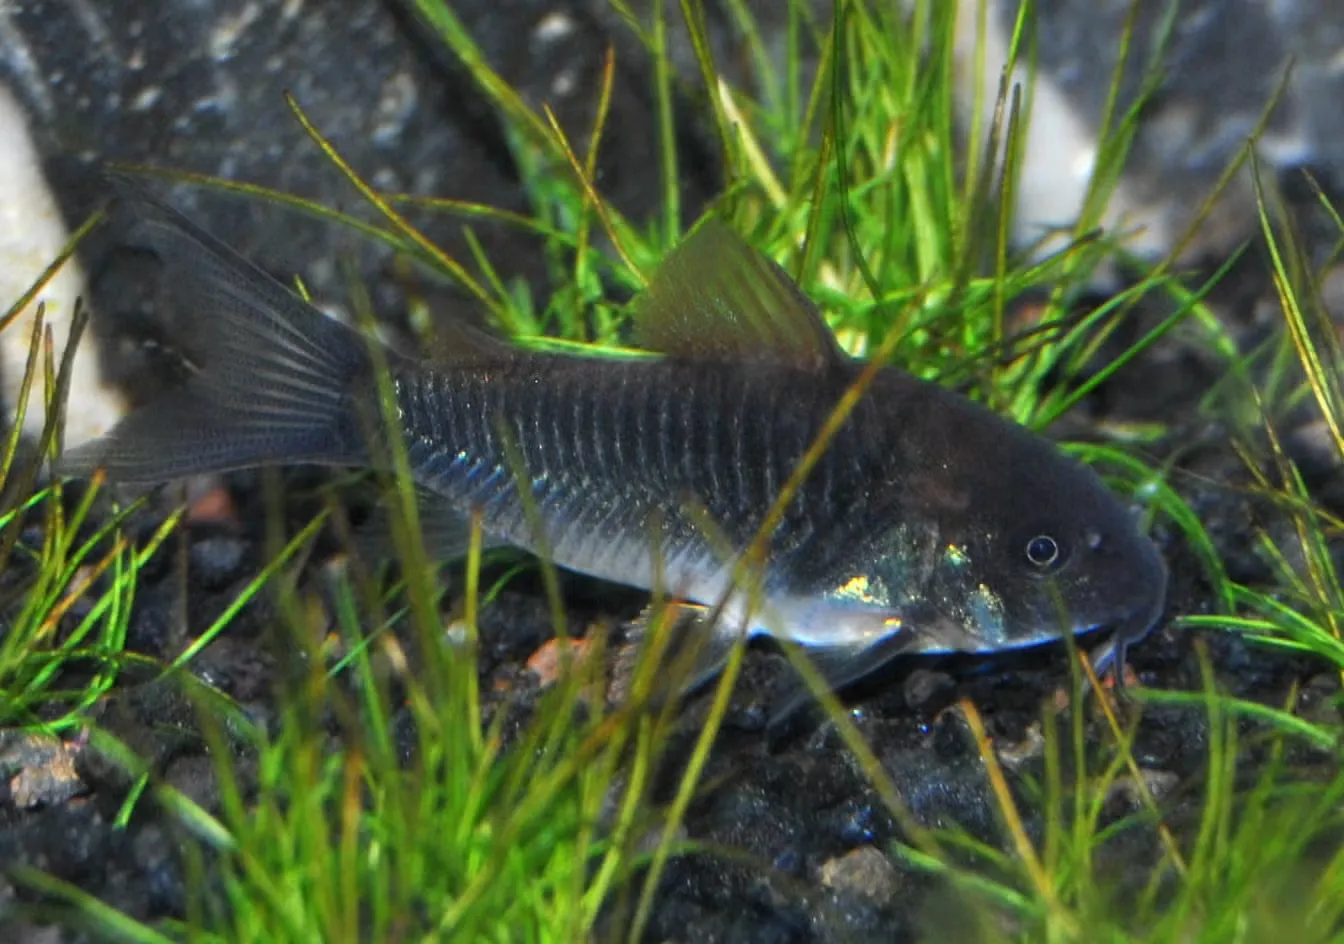
This is a small green Cory Cat added to the aquarium two weeks before adding more fish.
Adding Fish to the New Aquarium
After letting the plants adjust by themselves for a week, I added one fish, a small green Cory Cat. This helps get the nitrogen cycle going while I wait to add more fish.
After a couple of weeks, I ordered my Class N Orchid Endler's Livebearers and added them to the tank. Of course, I set the bags with the fish in them in the tank for 15 minutes to allow the water temperature to equalize, as always.
At this point, the tank should pretty much take care of itself other than some partial water changes, cleaning of glass and other surfaces, and periodic changing or cleaning of the filter media.
Below is a picture of the tank just after adding the Orchid Endler's Livebearers.
Featured Gallery
1 / 1
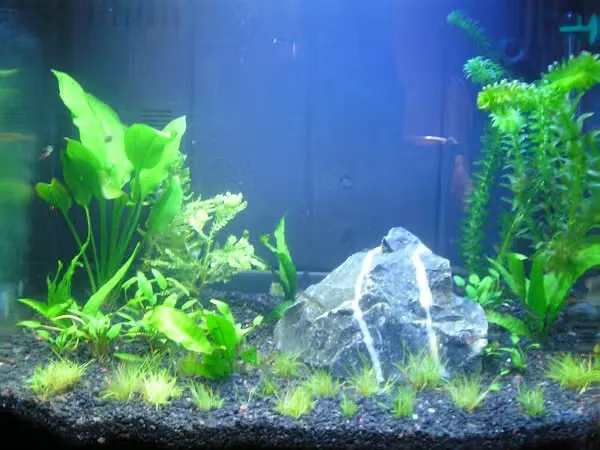
This is the aquarium soon after adding the fish.
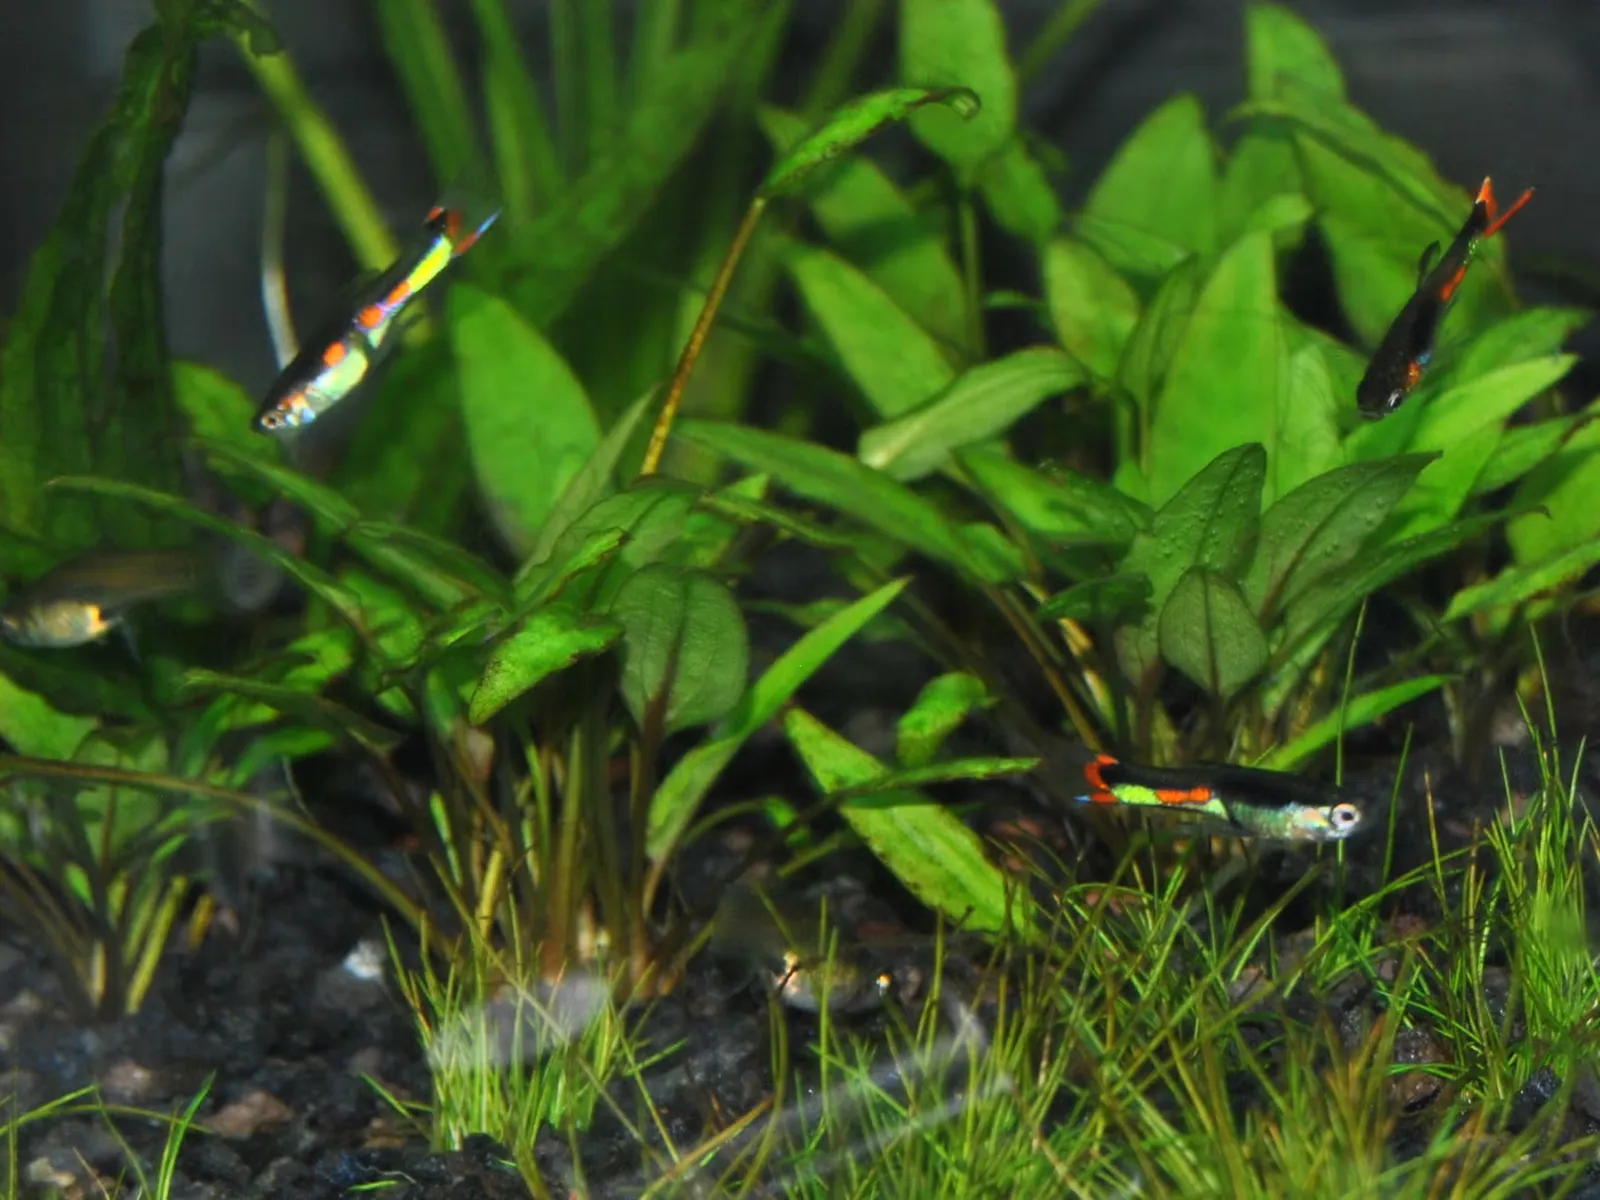
This is the aquarium with Orchid Endler's Livebearers added a little more than two weeks after adding the Green Cory Cat.
Questions & Answers
Question: I was wondering if I could use gravel from a goldfish aquarium in a new tank to help seed it? Will it harm any tropical fish?
Answer: As long as the gravel stays wet and you are sure it's free of illnesses or parasites, that should work well.
Question: Does the temperature strip go inside or outside the fish tank?
Answer: The temperature strip goes on the outside of the aquarium, however a more accurate method of measuring the temperature is to use an actual thermostat that goes on the inside.